Appearance
随记
多动手,多总结。
SpringBoot应用多环境打包部署,避免修改配置文件,可以通过命令行传参更改一些配置,虽然jvm/应用应用参数也能改,但是maven能一步到位不方便么,开整
参考文档
1. 准备一个springboot工程
2. 配置pom.xml
application.yml识别
@符号,两种方式任选其一即可,本文采用方式1 关键配置
xml
<build>
    <plugins>
        <!-- application.yml识别@符号方式1:添加plugin -->
        <plugin>
            <groupId>org.apache.maven.plugins</groupId>
            <artifactId>maven-resources-plugin</artifactId>
            <configuration>
                <delimiters>@</delimiters>
                <useDefaultDelimiters>false</useDefaultDelimiters>
            </configuration>
        </plugin>
    </plugins>
    <!-- application.yml识别@符号方式2:添加resource -->
    <!--<resources>
        <resource>
            <directory>src/main/resources</directory>
            <filtering>true</filtering>
            <includes>
                <include>**/*.*</include>
            </includes>
        </resource>
    </resources>-->
</build>
<!-- 多环境打包-->
<profiles>
    <profile>
        <id>dev</id>
        <!-- 默认值 -->
        <activation>
            <activeByDefault>true</activeByDefault>
        </activation>
        <properties>
            <profileActive>dev</profileActive>
        </properties>
    </profile>
    <profile>
        <id>test</id>
        <properties>
            <profileActive>test</profileActive>
        </properties>
    </profile>
    <profile>
        <id>pro</id>
        <properties>
            <profileActive>pro</profileActive>
        </properties>
    </profile>
</profiles>3. 配置springboot配置文件
默认配置文件从maven属性变量里取值,语法为
@属性名@, 此处profileActive就是在maven提前定义好的属性
- application.yml
yml
spring:
  profiles:
active: @profileActive@细节配置根据项目实际来,这里仅配置端口号,说明示例即可
- application-dev.yml
yml
server:
port: 38080- application-test.yml
yml
server:
port: 28080- application-pro.yml
yml
server:
port: 18080目录结构如下
shell
── pom.xml
    ├── src
    │   ├── main
    │   │   ├── java
    │   │   │   └── top
    │   │   │       └── zlhy7
    │   │   │           ├── Application.java
    │   │   │           └── controller
    │   │   │               └── TestController.java
    │   │   └── resources
    │   │       ├── application-dev.yml #开发环境
    │   │       ├── application-pro.yml #生产环境
    │   │       ├── application-test.yml #测试环境
    │   │       ├── application.yml #默认环境
    │   │       ├── static
│ │ └── templates4. 项目打包/运行
4.1 勾选idea-maven环境选项
在左侧maven-profile选项中选择对应的环境,然后进行项目的启动/打包 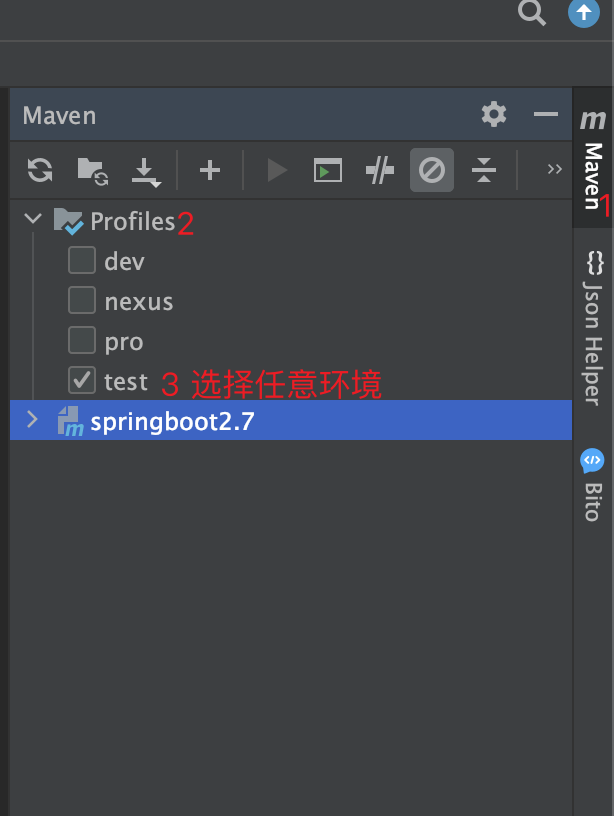
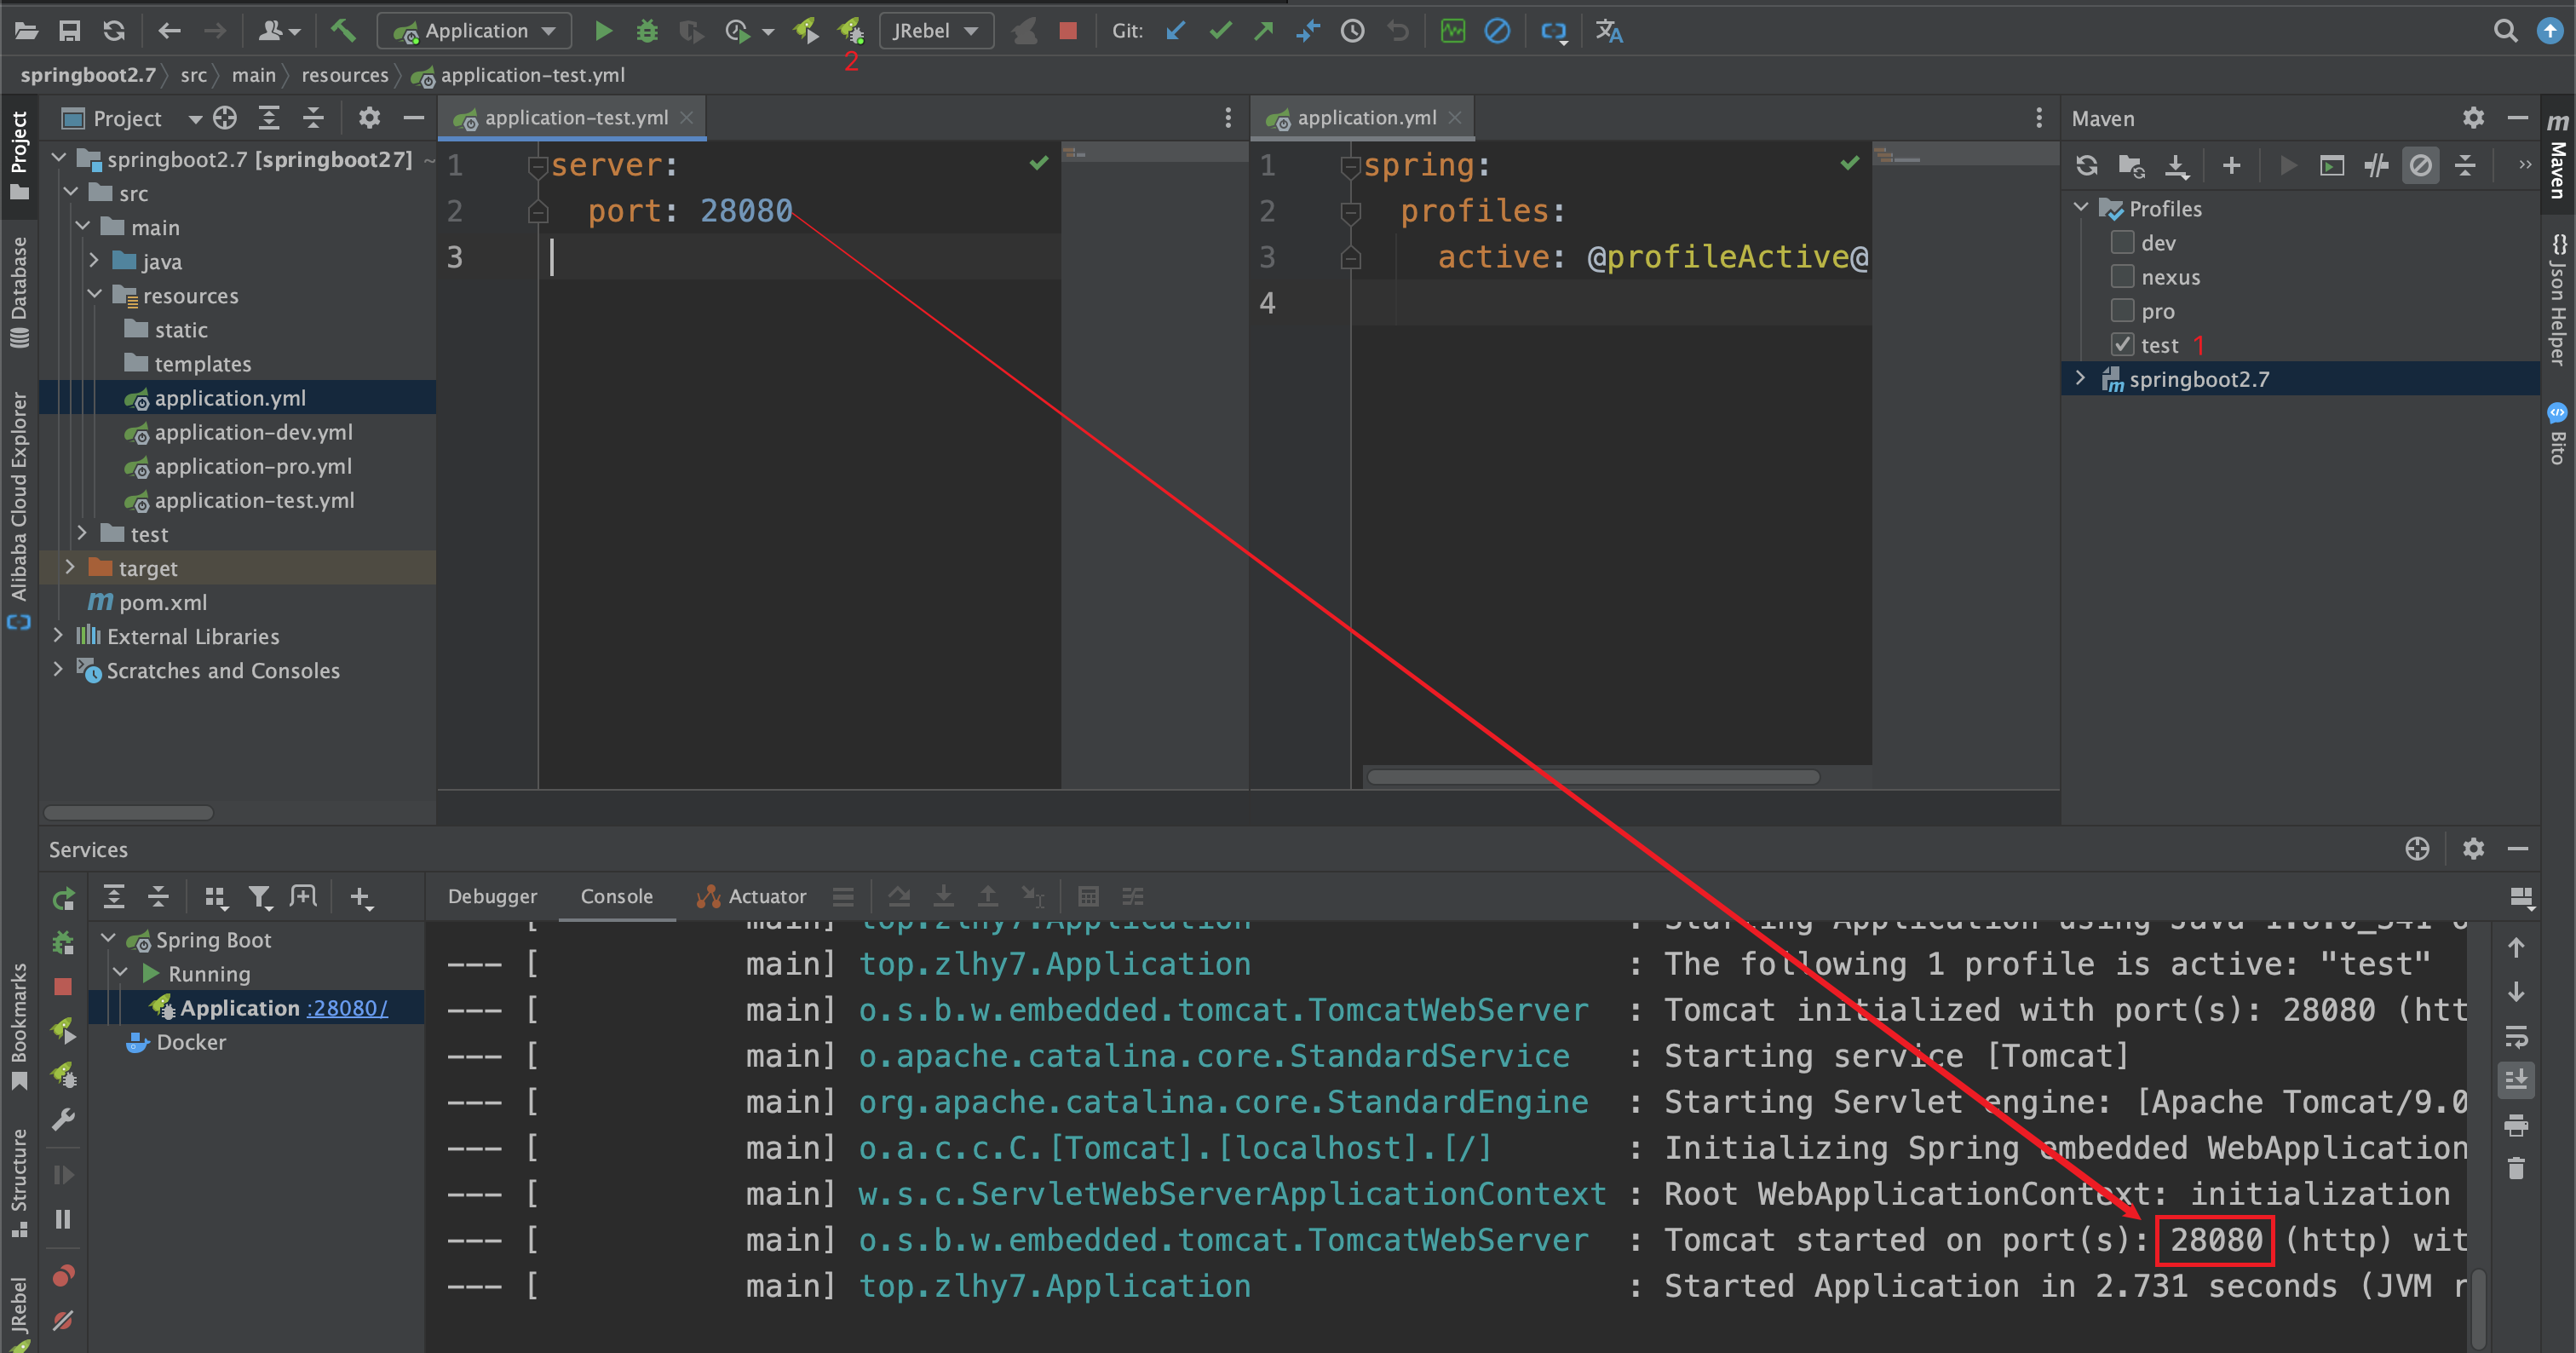
4.2 项目运行
4.2 打包(idea-maven方式)
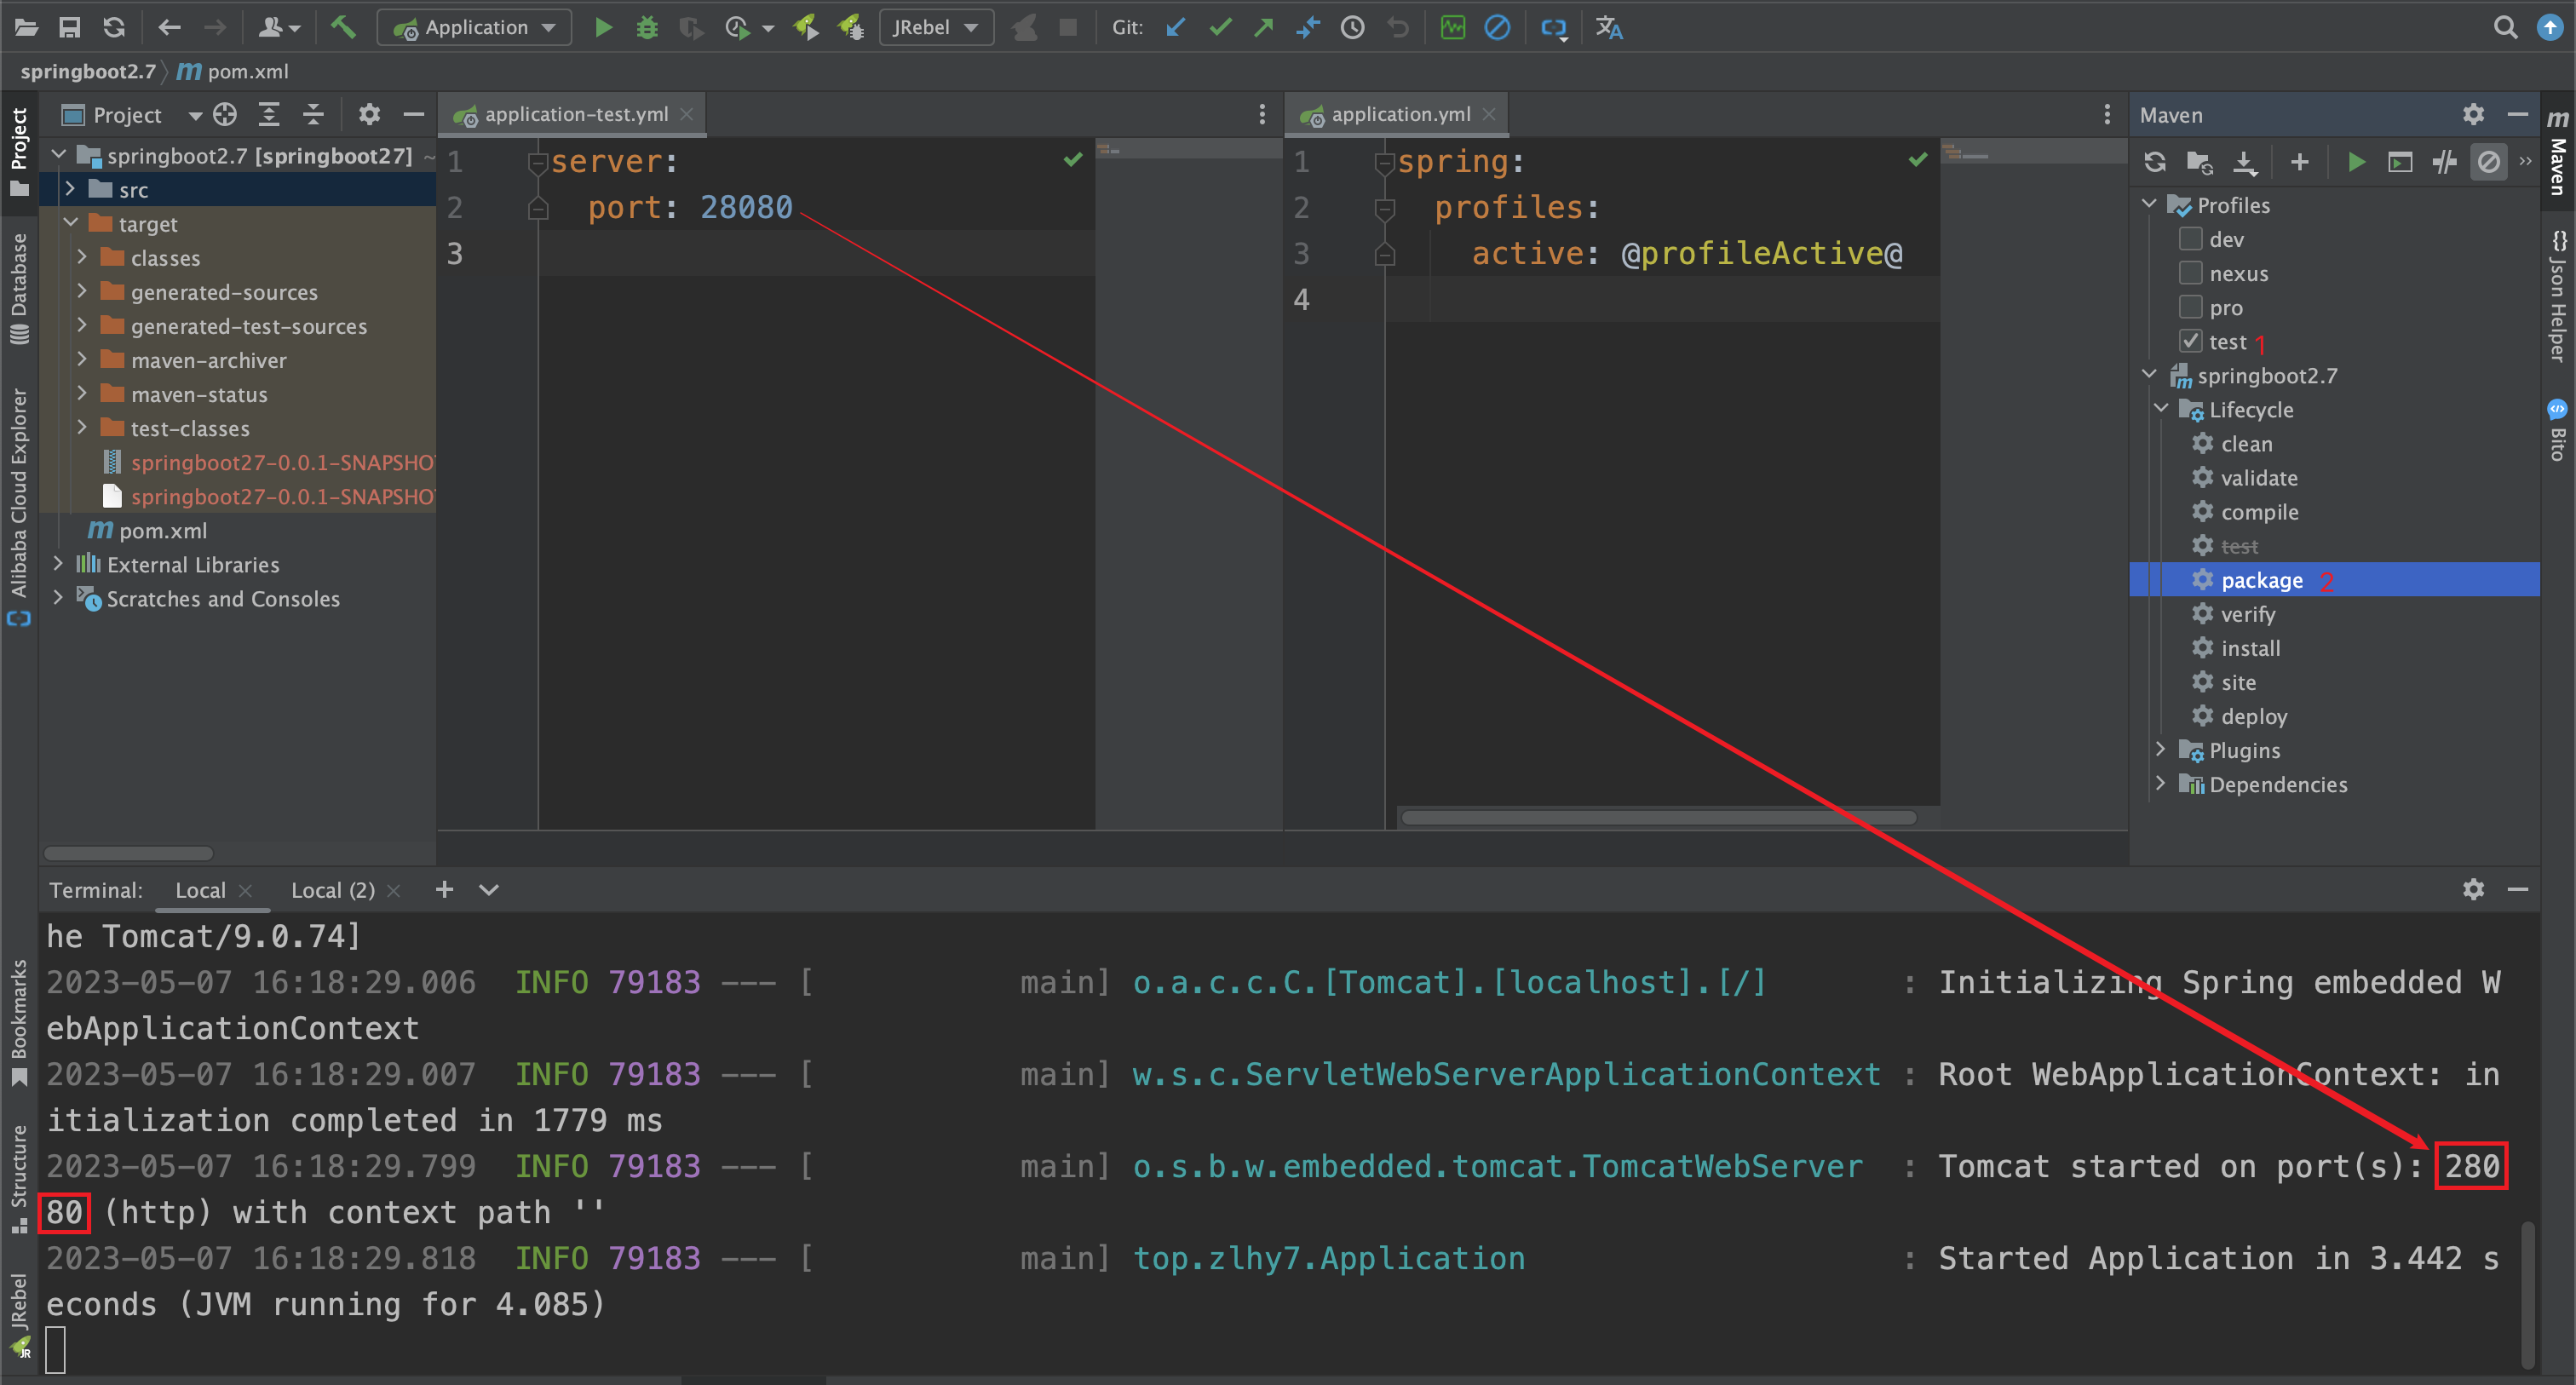
4.3 打包(命令行方式)
-P后面跟的test就是环境标识,即maven里定义的
shell
mvn clean package -Dmaven.test.skip=true -P test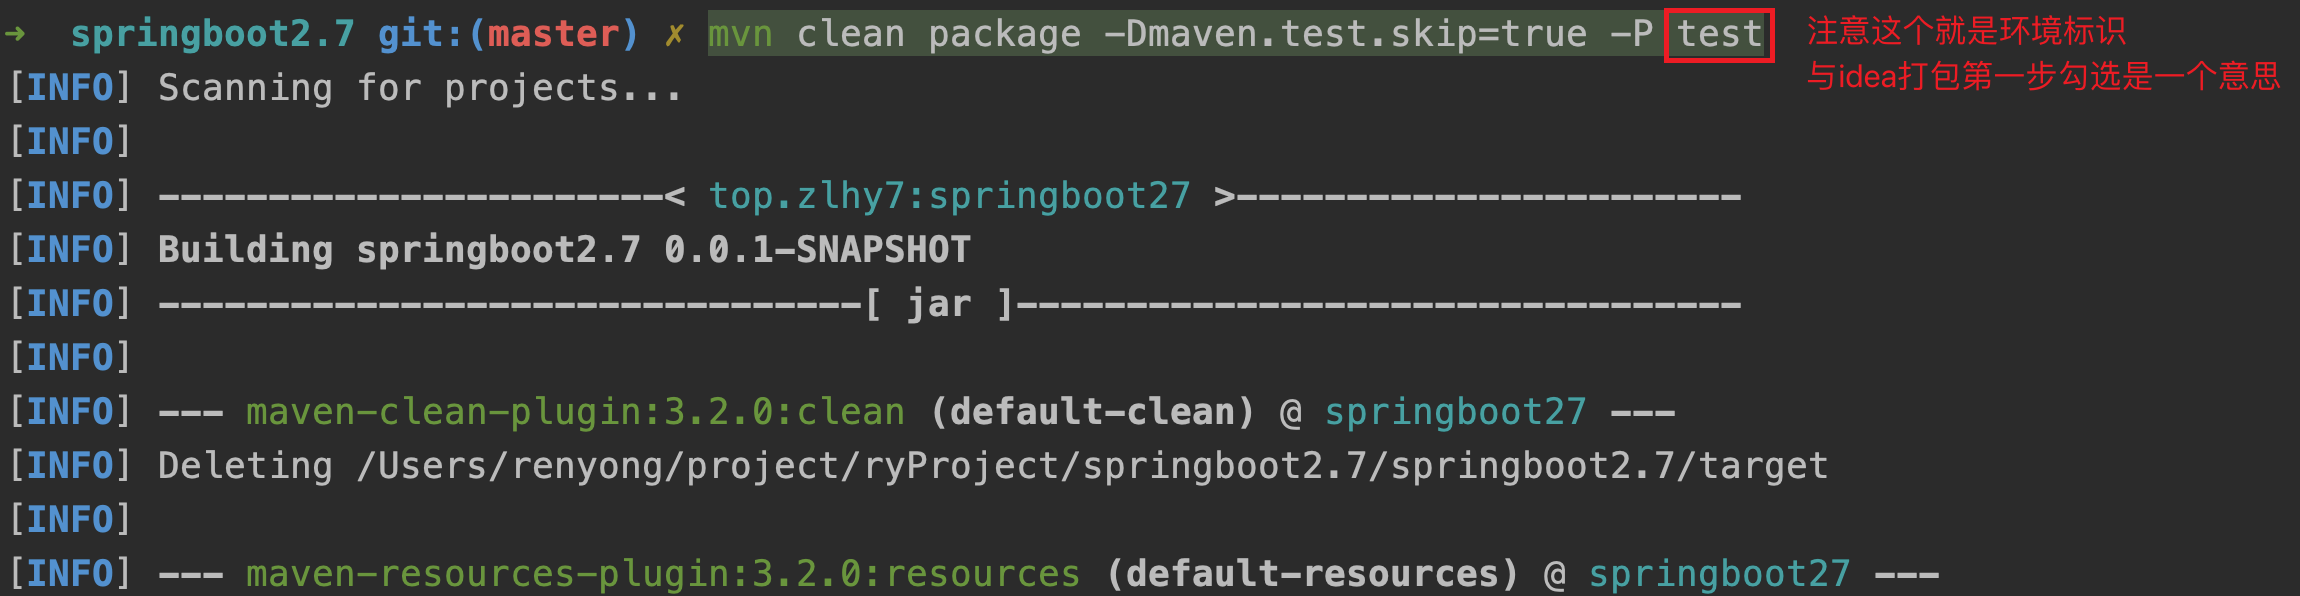
本质上就相当于把
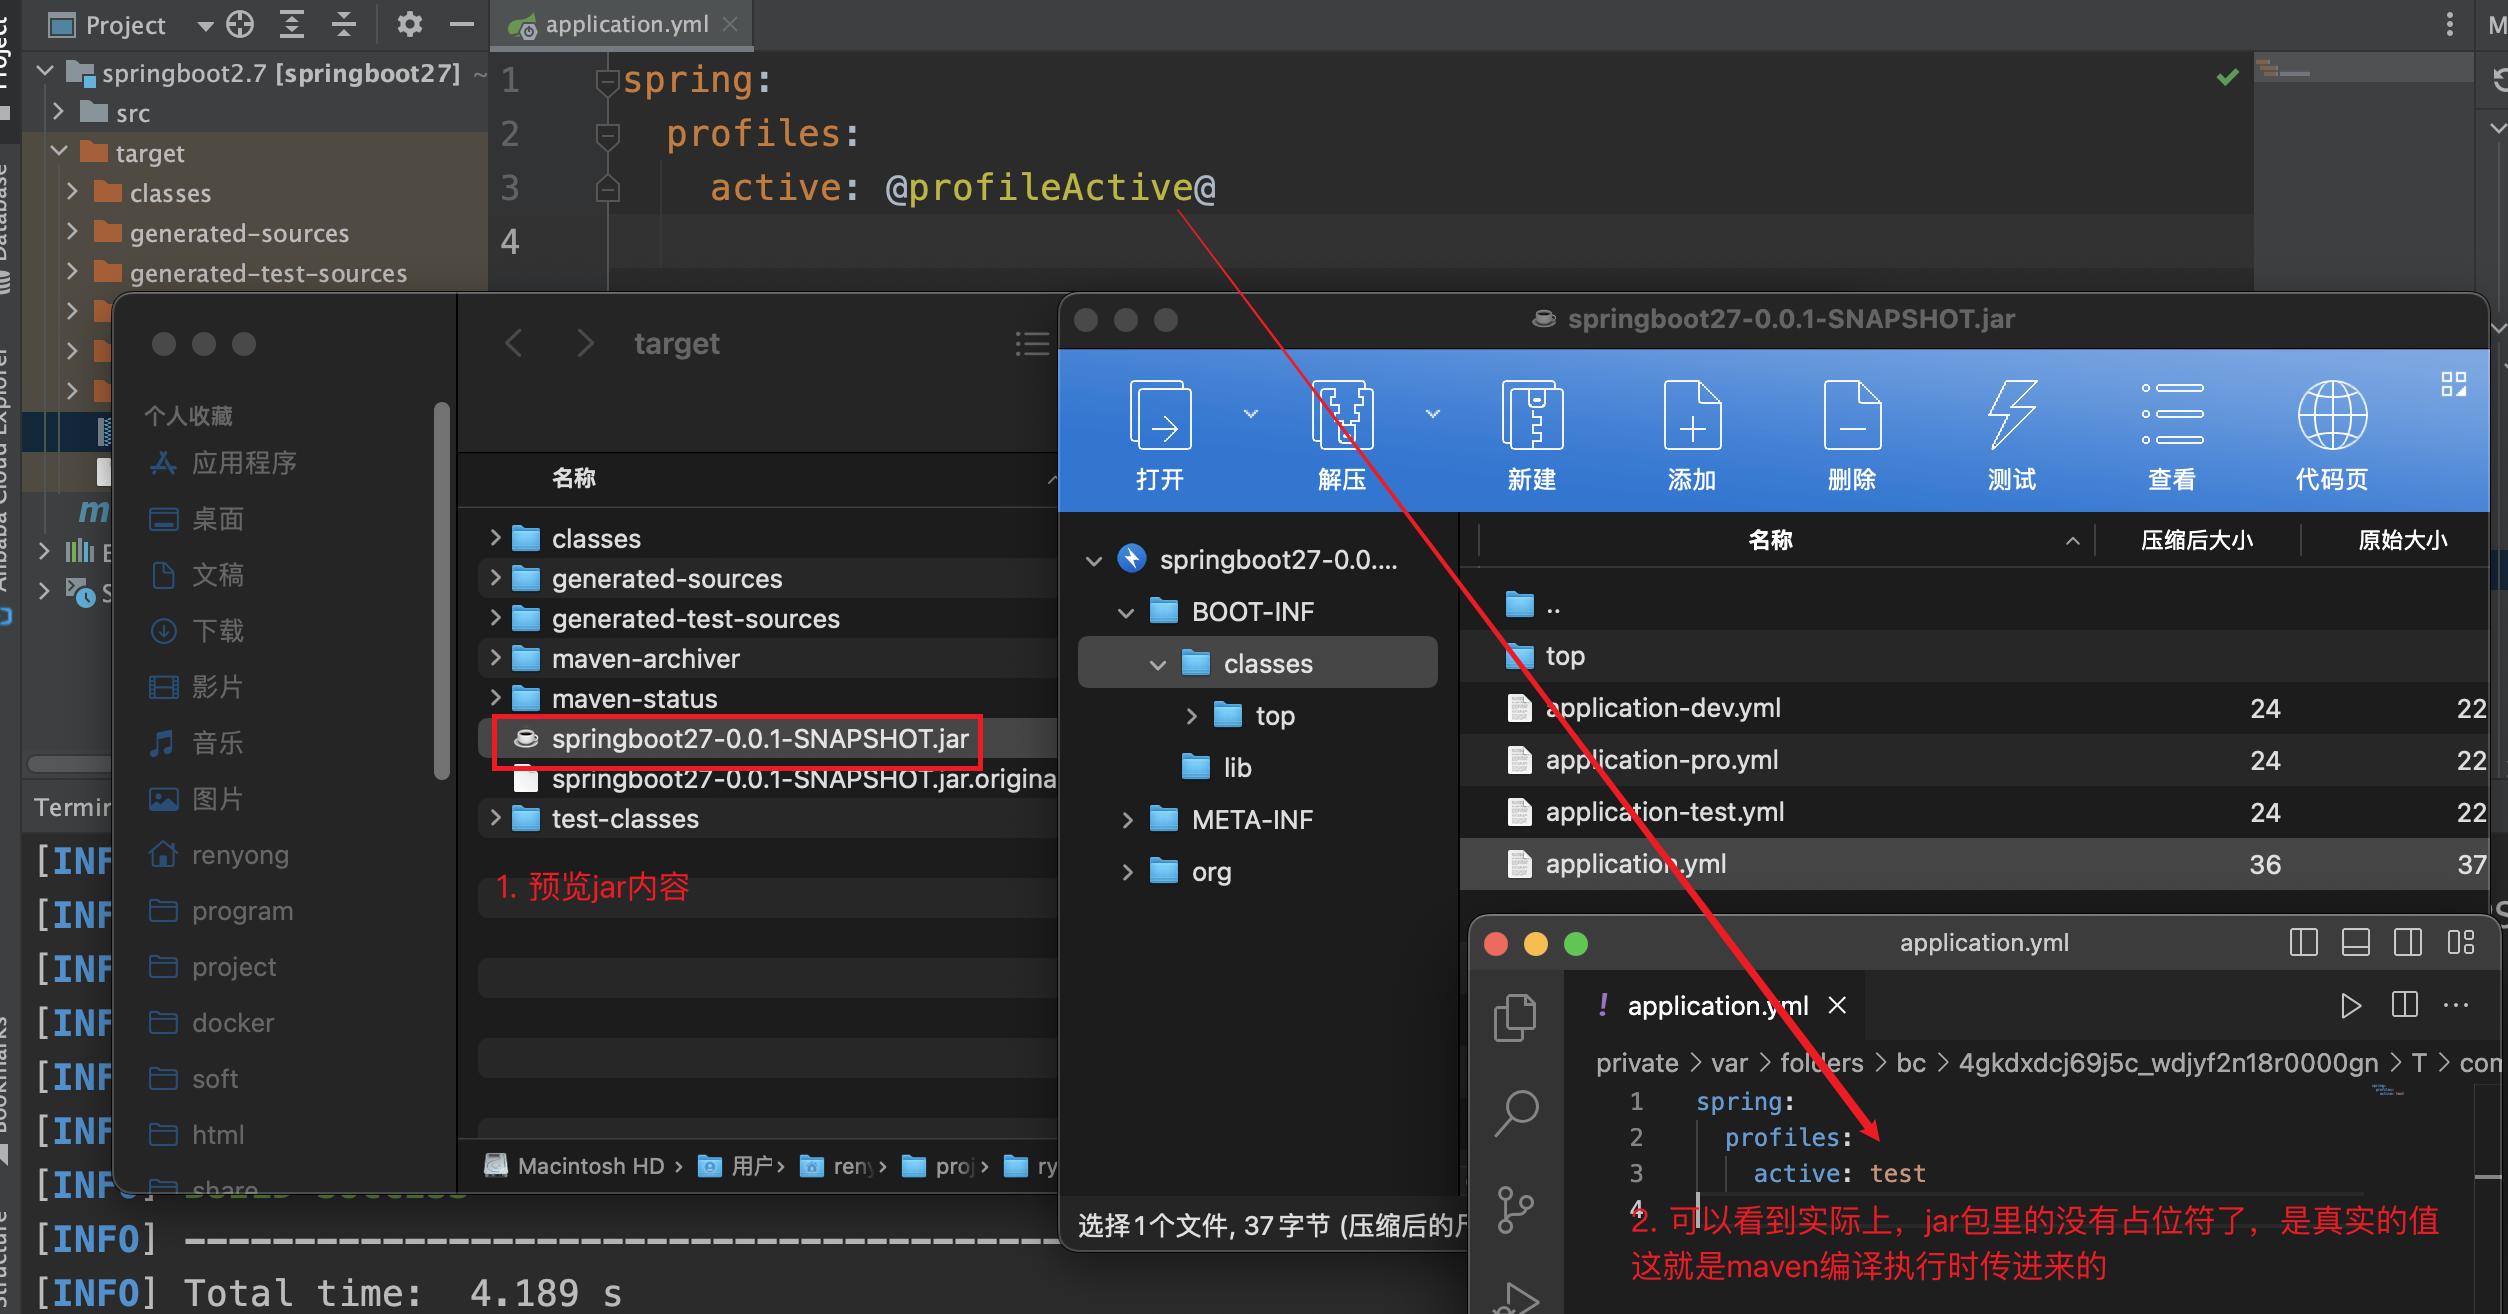
@属性名@在打包过程中渲染为真实的值,jar包里预览可见,已经没有占位符@xxx@了